Caring for houseplants or garden flora brings immense joy, but encountering a sick plant can quickly cause frustration. Plants communicate their distress through visual cues, and interpreting these signals is the cornerstone of effective botanical care. Diagnosing the exact root cause of a failing plant requires patience, careful observation, and a methodical approach. Instead of guessing and arbitrarily changing watering schedules or applying random fertilisers, plant owners should act like detectives. A systematic diagnostic process eliminates guesswork, ensuring that treatments address the actual underlying condition rather than just masking the symptoms. By understanding the core principles of plant health, anyone can learn to read the signs of distress and intervene before irreversible damage occurs.
Observing Your Plant: The First Step
The diagnostic journey always begins with a thorough and objective visual inspection of the entire plant. You must look beyond the most obvious damaged leaves to assess the plant’s overall structural integrity. Carefully examine the newer growth at the top, the older leaves near the base, the stems, and the soil surface. Noting exactly where the symptoms appear provides critical clues, as certain problems manifest uniquely on specific parts of the plant. For instance, issues that appear on old growth first often indicate a different class of problems than those appearing on brand-new shoots. Documenting the colour, texture, and firmness of the affected areas creates a baseline for your diagnosis. Taking photographs can also help you track the progression of the symptoms over several days, revealing whether the condition is rapidly spreading or relatively stable.
Common Symptoms and Their Meanings
Plants exhibit a limited range of stress responses, meaning many different problems can initially look quite similar. Yellowing leaves, a condition known as ‘chlorosis’, frequently indicate watering imbalances, though the precise shade and location of the yellowing can help narrow down the culprit. Drooping or wilting foliage typically signals an issue with water uptake, which could stem from either parched soil or severely waterlogged roots that have suffocated. Brown, crispy edges often point to environmental stress, particularly low humidity or chemical burns from tap water. Disfigured, stunted, or curled leaves usually suggest pest interference or a viral infection disrupting normal cellular development. Learning to accurately describe these visual symptoms is essential for cross-referencing your observations with known botanical ailments.
Environmental Factors: Light, Water, and Temperature
A vast majority of plant ailments arise from improper environmental conditions rather than infectious diseases. Light exposure dictates a plant’s ability to photosynthesise, and both excessive direct sunlight and prolonged darkness will rapidly degrade plant health. Watering habits represent the most common pitfall, as overwatering depletes soil oxygen and rots the root system, while underwatering dehydrates the plant tissues. Temperature fluctuations and ambient humidity levels also play a massive role in transpiration rates. Placing a tropical plant near a draughty window or a heating vent can cause severe shock, leading to rapid leaf drop. Evaluating and correcting these baseline environmental variables will often resolve the problem without the need for chemical interventions.
Pests and Diseases: Identification and Treatment
When environmental factors are optimal but the plant continues to decline, pests and pathogens become the prime suspects. Common indoor pests include spider mites, aphids, mealybugs, and fungus gnats, all of which feed on plant sap and sap the host’s energy reserves. You must inspect the undersides of leaves and the junctions where stems meet the main branch, as these insects prefer hidden crevices. Fungal and bacterial diseases typically present as localised spots, powdery coatings, or mushy, foul-smelling tissue decay. Treating these issues requires isolating the affected plant immediately to prevent transmission to your broader collection. Eradicating pests usually involves insecticidal soaps or neem oil applications, while managing diseases requires removing the infected foliage and improving local air circulation.
Nutrient Deficiencies vs. Excesses
Plants rely on a delicate balance of macronutrients and micronutrients extracted from the soil to fuel their biological processes. A nitrogen deficiency typically manifests as generalised yellowing across the older, lower leaves, as the plant sacrifices old tissue to support new growth. Conversely, a lack of iron or magnesium often causes interveinal chlorosis, where the leaf tissue turns yellow but the veins remain starkly green. However, providing too much fertiliser can be equally destructive. Fertiliser burn occurs when excess mineral salts accumulate in the soil, drawing moisture out of the roots and resulting in scorched, brown leaf tips. Flushing the soil with distilled water can remove these excess salts, while applying a balanced, diluted liquid fertiliser can gently correct any minor deficiencies.
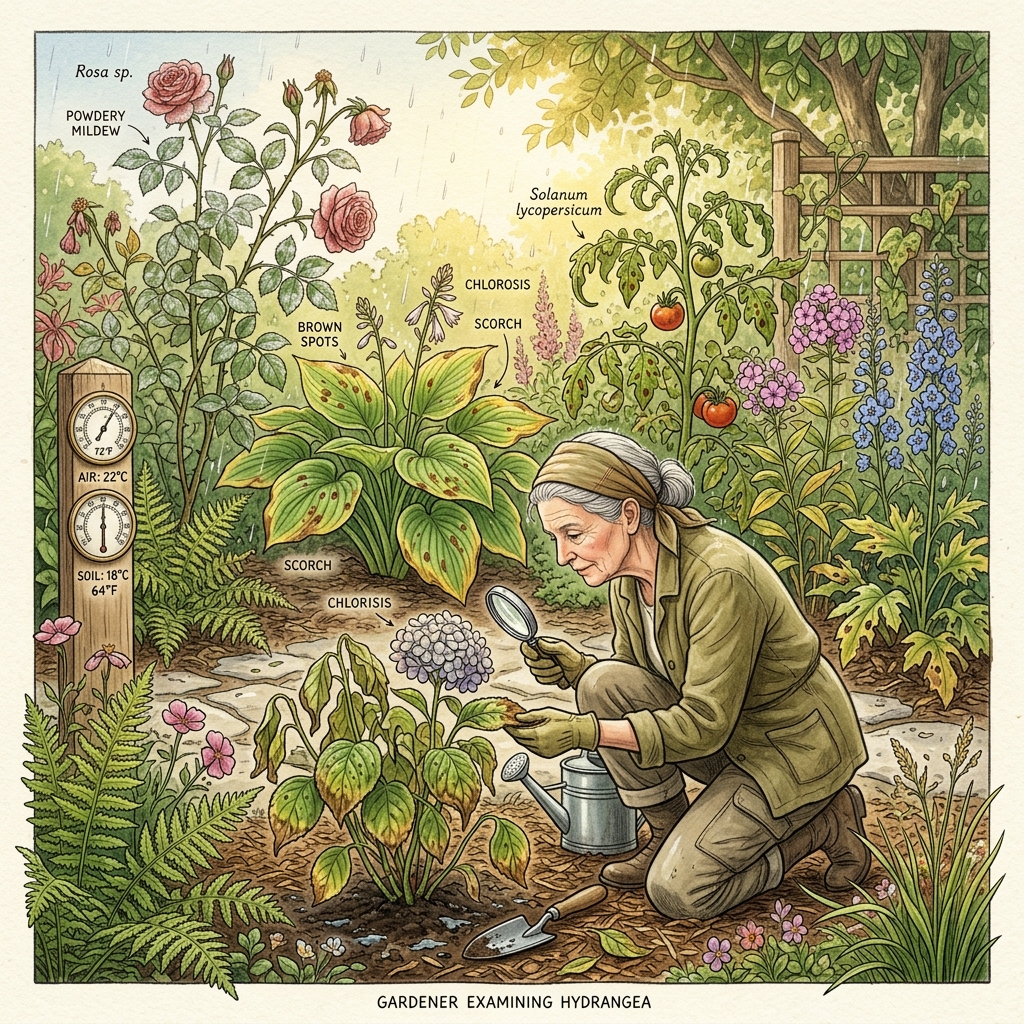
Systematic Troubleshooting: A Decision Guide
Combining all these observations into a logical sequence allows for accurate and confident diagnosis. First, you should test the soil moisture level and evaluate the watering frequency, as root rot or severe dehydration causes the vast majority of rapid declines. Next, verify that the current light intensity and ambient temperature match the specific requirements of that exact plant species. If the environment is completely sound, use a magnifying tool to hunt for physical pests or sticky residue on the foliage. Finally, consider the plant’s feeding schedule and the age of the potting mix to determine if a nutrient imbalance is to blame. This step-by-step elimination process prevents hasty reactions and ensures that your chosen remedy aligns with the actual distress signal.
Prevention and Ongoing Care
Maintaining robust plant health requires transitioning from reactive troubleshooting to proactive husbandry. Regularly wiping down leaves with a damp cloth not only removes dust to aid photosynthesis but also provides an opportunity to spot early signs of pest infestations. Establishing a consistent watering routine based on soil dryness rather than a rigid calendar schedule prevents the dangerous extremes of drought and flooding. Repotting plants every year or two replenishes depleted nutrients and prevents root binding, which can severely limit water and nutrient uptake. Quarantining any newly purchased plants for several weeks before introducing them to your main collection is a vital biosecurity measure that blocks the introduction of foreign pests.
Conclusion:
Mastering the art of plant diagnosis transforms the anxiety of plant ownership into a deeply rewarding and educational experience. Every struggling plant offers a lesson in environmental chemistry, biology, and the delicate balance required to sustain life indoors. By committing to careful observation and systematic troubleshooting, you build an intuitive understanding of what your botanical companions truly need. Apply these diagnostic steps patiently; trust your observational skills, and you will develop the expertise required to cultivate a thriving, resilient indoor garden.