
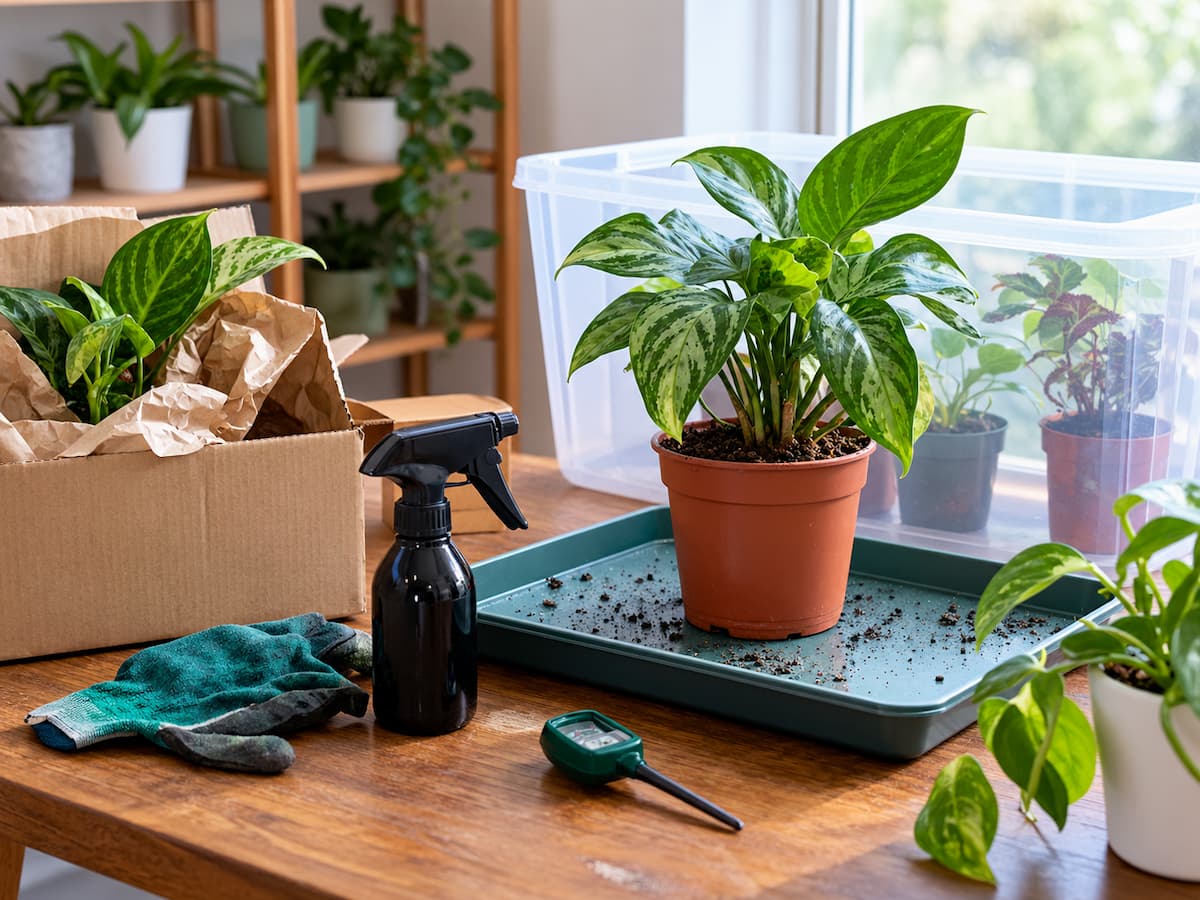
You bring home a new houseplant from a nursery, find a suitable spot for it, and place it beside the plants you already own. Its leaves look healthy, the stems appear firm, and there are no obvious signs of trouble. A few days later, you notice tiny insects on a nearby plant or fine webbing beneath a leaf. The new arrival may not be responsible, but its introduction has created a problem that is now harder to investigate.
This is why a quick inspection alone is not always enough. Some pests are difficult to see, and early signs may be limited to a few marks or small insects hidden around leaf joints. A plant can also look healthy while carrying a problem that becomes easier to notice over time. Quarantining a new houseplant gives you an opportunity to observe it before it joins your established collection. You do not need a special greenhouse or an elaborate setup. You need a suitable separate location, a consistent inspection routine, and a clear process for deciding what to do when something looks unusual.
1. Understand What Plant Quarantine Means
Plant quarantine, in a home gardening setting, means keeping a newly acquired plant separate from your established plants while you inspect and observe it. The purpose is to notice possible pests, visible disease symptoms, and adjustment problems before the new plant shares space with the rest of your collection. Quarantine is a precaution, not a treatment. A plant does not need to look sick to benefit from temporary separation, and separating it does not mean that it is infected or infested.
It is also important to distinguish observation from diagnosis. Finding a pale mark on a leaf does not automatically mean the plant has a disease. The mark could be related to handling, sun exposure, watering, or another environmental factor. Similarly, finding a small insect does not always tell you whether it is harmful to the plant. If you discover a confirmed pest problem, the plant needs more than routine observation. You may need to identify the pest, select an appropriate treatment, and continue keeping the plant separate while you assess the results.
The main principle is simple: inspect first, observe changes, investigate warning signs, and introduce the plant only when the available evidence gives you reasonable confidence that doing so is appropriate.
2. Arrival Day: Inspect the Plant Before Placing It in Quarantine
Ideally, inspect the plant before putting it down near your existing collection. If you have already brought it indoors, keep it away from other plants while you complete the first check. You do not need to remove every leaf or disturb the roots. Start with a careful visual inspection under good light. A handheld magnifier can help you examine tiny insects or marks, but careful observation is still useful without one.
Examine the leaves from both sides.
Look at the upper surfaces of the leaves, then turn them over to inspect the undersides. Pay attention to leaf veins, edges, folds, and areas where leaves overlap. Look for moving insects, small clusters of insects, unusual speckling, discoloured patches, fine webbing, or sticky residue. Some pests are very small and may blend into the leaf surface. Others leave signs of feeding even when the insects themselves are difficult to find.
Check several leaves rather than stopping after the first healthy-looking one. Include older leaves and newer growth because signs may not appear evenly across the plant. Avoid interpreting every mark as a pest problem. A few damaged areas may have developed during transport or before the plant reached the seller. Record unusual findings so you can determine whether they change during the following days.
Inspect stems and leaf joints.
Examine the stems, branching points, and places where leaves attach to the plant. These sheltered areas can hide small insects or clusters that are easy to miss during a quick glance. Look for cotton-like material, unusual bumps, fine webbing, or insects that move when the plant is gently examined. If something is attached firmly to the stem, do not immediately assume it is a pest; some plant structures and natural markings can resemble insect coverings. Use a gentle touch and avoid scraping or squeezing unfamiliar growths before you understand what they are.
Check the growing-medium surface and pot rim.
Inspect the surface of the growing medium for moving insects, unusual growth, or signs that the medium is persistently wet. Check around the inside and outside of the pot rim, where debris and small organisms may collect. If the plant is sitting inside a decorative outer pot, look for standing water or material that may have accumulated at the bottom. Remove excess water when appropriate, since leaving the inner pot submerged can create root problems unrelated to pests. Do not dig through the roots simply because you are quarantining the plant. Disturbing the root system without a clear reason can add unnecessary stress.
Look at the drainage holes where visible.
If the pot can be inspected safely without damaging the plant, check its drainage openings and the surrounding base. Look for unusual insects, larvae-like organisms, or other signs that deserve a closer look. You do not need to remove a firmly established plant from its pot just to inspect the drainage holes. If the openings are hidden, record that the area was not checked and focus on the parts you can examine. One inspection cannot rule out every pest. Eggs, tiny insects, and pests hidden in folded leaves or growing medium may remain unnoticed. The arrival-day inspection establishes a starting point for comparison rather than proving that the plant is pest-free.
3. Choose a Suitable Temporary Location
After the initial inspection, move the plant to a location where it can remain separate from your established collection. The space does not have to be a dedicated plant room. A separate area of a room may work if it provides suitable conditions and prevents leaves, branches, or watering equipment from coming into contact with other plants. Choose the location based on the plant’s needs as well as the need for separation.
Maintain suitable light and temperature.
Do not isolate a plant in a dark cupboard or an unsuitable corner simply because it is away from other plants. Poor conditions can cause new symptoms, making it harder to tell whether the plant has a pest problem or is reacting to its environment. Provide light appropriate for the plant species, and avoid sudden, harsh changes from its previous conditions. Keep it away from extreme heat, cold drafts, and other conditions that may cause unnecessary stress. If you use a room with limited natural light, consider whether suitable supplemental lighting is available. The purpose is to maintain reasonable growing conditions while keeping the plant apart from the collection.
Keep the setup physically separate.
Place the plant on its own tray or another clean, easy-to-inspect surface. Do not let its foliage touch neighbouring plants, and avoid placing it where water draining from the pot can reach another plant. Use separate or thoroughly cleaned tools when handling the new arrival. This includes pruning tools, plant labels that have been in contact with the growing medium, and other equipment that may carry insects or contaminated plant material. Keep the quarantine tray free from old leaves and standing water. A clean surface makes it easier to notice fallen insects, debris, or changes that need attention.
Establish a separate handling routine.
When possible, inspect and care for established plants before handling a new arrival that has suspicious signs. Wash your hands afterwards, especially if you have touched insects, damaged leaves, or the growing medium. Avoid moving the new plant repeatedly between rooms. Frequent movement can expose it to other plants and change its growing conditions. A stable location makes observations easier to compare. If the only available separate area has unsuitable conditions, consider a temporary physical barrier or a different arrangement that provides both separation and appropriate care. Isolation should reduce contact with other plants without creating a new problem for the plant being observed.
4. Follow a Staged Observation Plan
Quarantine is most useful when you check the plant more than once and compare what you see. A single arrival-day inspection can miss early signs, while random checks make it harder to tell whether a problem is developing. The observation period should depend on the plant, its condition, its source, the signs you discover, and the pests that may be of concern. There is no universal number of days that guarantees a plant is free of pests.
Arrival day: Establish a baseline.
Record the plant’s condition before making unnecessary changes. Note the general appearance of the leaves, stems, and new growth. Write down any unusual marks, insects, webbing, sticky areas, or other findings. Also record anything that may affect later observations, such as damage that appears to have occurred during transport or a growing medium that was already very wet. If you find a clear sign of a possible pest, keep the plant separate and investigate promptly rather than waiting for the next routine inspection.
During the first follow-up checks: Look for changes.
Return to the same inspection areas during subsequent checks. Examine both leaf surfaces, leaf joints, stems, and the growing-medium surface. Compare the plant with your original notes. Look for new damage, moving insects, spreading marks, or signs that were not present before. If a symptom remains unchanged, record that too. A stable mark may have a different meaning from one that spreads across several leaves. Check the plant according to its watering needs, but avoid adding unnecessary water just to maintain a routine. Watering should depend on the plant and growing medium rather than the quarantine calendar.
Continue observation according to the evidence
If the plant remains stable and repeated inspections reveal no warning signs, you may gradually gain confidence that it can join the collection. If the plant develops new symptoms, the observation period should change accordingly. A possible pest sighting, fresh damage, or a symptom that spreads may justify further identification and treatment before introduction.
Plants from a crowded display, a plant swap, or an environment where other plants show visible pest problems may warrant closer attention. A plant with a known exposure should not be treated the same as one that has simply arrived without any warning signs. Do not treat the end of a chosen calendar period as proof of safety. The purpose of observation is to make a better-informed decision, not to satisfy a fixed number of days.
5. Recognize Warning Signs Without Jumping to Conclusions
Some signs deserve closer inspection because they may indicate a pest problem or another plant health issue.
| Observation | What it may suggest | What to do next |
|---|---|---|
| Fine webbing beneath leaves or around stems | Possible spider mites or another source of webbing | Inspect nearby leaf surfaces closely and look for tiny moving organisms. |
| Moving insects on leaves or stems | Possible pest activity, although some insects may be harmless | Observe their appearance and location, then identify them before choosing a treatment. |
| Sticky residue on leaves or nearby surfaces | Possible honeydew-producing insects or another source of residue | Inspect leaf joints and stems for insects and compare the residue’s location with other signs. |
| New pale speckles, spots, or distorted growth | Possible feeding damage, disease, or environmental stress | Record the affected areas and investigate whether the pattern changes. |
| Small clusters or cotton-like material on stems | Possible scale insects, mealybugs, or another cause | Examine the material carefully and seek identification if uncertain. |
| New damage appearing after arrival | Possible pest activity, transport injury, or adjustment stress | Compare it with the arrival-day record and inspect the plant again. |
These observations are clues, not confirmed diagnoses. Fine webbing, for example, may be produced by spiders that are not feeding on the plant. Leaf spots can have several causes, and sticky residue may come from sources other than pests. Avoid applying a pesticide simply because a leaf looks unusual. First determine whether there is evidence of a pest and, when possible, identify the likely cause.
The Plant Problem Troubleshooter can help you work through visible symptoms and possible causes. Use it to organize your observations and consider what to investigate next. Its result is not a guaranteed pest identification and does not replace a direct inspection of the plant.
Plant Problem Troubleshooter
Choose the symptom you can see on your plant.
If the signs remain unclear, take clear photographs of the affected areas and seek advice from a knowledgeable nursery professional, local horticultural service, or plant health specialist. Accurate identification is especially important before using a treatment.
6. What to Do When You Find Possible Pests
If you notice insects, webbing, or other signs that suggest an infestation, keep the plant separated from your established collection. Do not move it next to another plant to compare symptoms, and avoid sharing tools or trays until they have been cleaned appropriately. The next step is to identify the suspected problem as accurately as possible. Note where the signs appear, whether insects are moving, whether new damage is developing, and which parts of the plant are affected. Once the pest is identified or reasonably suspected, choose an appropriate response for that pest and plant.
For a small, localized problem, physically removing affected debris or carefully wiping accessible plant surfaces may be useful, depending on the plant and the suspected pest. These actions do not guarantee that the problem is eliminated, particularly when eggs or insects are hidden in folds, roots, or growing medium. If a pesticide or other pest-control product is needed, check that it is suitable for the identified pest, the plant, and the intended indoor use. Follow all label instructions, including application directions, protective measures, ventilation requirements, and any restrictions involving children or pets. Never mix products or increase the recommended concentration in an attempt to obtain faster results.
Avoid spraying unfamiliar substances on a plant as a test. Some plants are sensitive to particular ingredients, and an unsuitable treatment can damage foliage without solving the original problem. After any treatment, keep the plant separated and continue checking for signs of activity. Follow the product’s directions for repeat applications or other follow-up steps rather than applying it more often than instructed.
If the plant is severely affected, the suspected pest cannot be identified, or the problem continues despite appropriate action, seek expert advice. In some cases, removing the plant from the collection or disposing of it responsibly may be the most practical way to reduce risk to other plants. Do not move a treated plant back into the collection solely because the insects are no longer visible immediately after treatment. Consider the treatment instructions, the type of pest, the possibility of hidden life stages, and the results of follow-up inspections.
7. Keep a Simple Observation Log
A written record makes quarantine easier to manage, especially if you bring home several plants over time. It helps you distinguish old damage from new changes and remember what you have already checked. Record the date, the part of the plant inspected, what you observed, any action taken, and what needs to be checked next. If you take photographs, use similar angles and lighting when possible so that comparisons are more useful.
The Plant Care Schedule Builder can help you organize routine checks and follow-up observations. Use it as a scheduling aid alongside your own records. Do not assume that it automatically detects pests or creates a quarantine protocol.
Plant Care Schedule Builder
Build a simple routine you can adapt to your plants.
Here is an example of how an observation log can be organized. The entries are illustrative and are not a diagnosis of a real plant.
| Date | Inspection area | Observation | Action taken | Follow-up |
|---|---|---|---|---|
| Day 1 | Upper and lower leaves | No moving insects noticed; two older leaves have pale marks | Recorded the marks and photographed both leaves | Compare the same areas during the next inspection |
| Day 3 | Leaf joints and stems | No visible change; no new signs noticed | Continued separation and routine care | Check for new marks or moving insects |
| Day 6 | Lower leaf surface | Fine webbing noticed on one leaf; cause not confirmed | Kept plant separate and examined the affected area more closely | Identify the source before choosing a treatment |
| Day 7 | Affected leaf and nearby stems | Additional inspection needed to determine whether the webbing is associated with pests | Sought further identification advice | Follow the recommended next steps |
Use actual dates rather than relying only on labels such as Day 3. This makes the record more useful if you need to review the sequence later or ask a specialist for advice.
A log does not need to be detailed enough to become a burden. A few clear observations are more useful than long notes that you do not keep up to date.
8. Decide When the Plant Can Join Your Collection
A plant may be ready to join your established collection when repeated inspections reveal no concerning signs, its condition is stable, and any previously suspected problem has been appropriately investigated and managed. Before introducing it, perform one more careful check of the leaves, stems, leaf joints, growing-medium surface, and pot where visible. Review your log to make sure you have not overlooked a developing symptom or an unresolved concern.
If the plant has had a confirmed pest problem, follow the relevant treatment guidance and obtain expert advice when necessary. The appropriate observation period will depend on the pest, treatment, and likelihood of hidden or newly emerging activity. Do not rely on a fixed waiting period alone.
Once you introduce the plant, continue to monitor it during your regular collection checks. New symptoms can appear after the original observation period, and some problems may have been difficult to detect earlier. Continued monitoring helps you respond before a small issue becomes more widespread. Avoid placing the new arrival directly against other plants immediately if its growth habit or size makes close contact likely. Keep an eye on its condition as it adjusts to its new environment, and investigate any concerning changes rather than assuming that every new mark is a pest. Quarantine reduces the chance of introducing an unnoticed problem, but it cannot eliminate every risk. A careful inspection routine, accurate records, and sensible follow-up provide a stronger approach than relying on appearance alone.
9. New Houseplant Quarantine Checklist
Use this checklist whenever you bring a new plant into your home.
- Inspect the plant before placing it near established plants.
- Check upper and lower leaf surfaces, stems, and leaf joints.
- Inspect the growing-medium surface, pot rim, and visible drainage holes.
- Record unusual marks, insects, residue, or other findings.
- Choose a separate location with suitable light, temperature, and airflow.
- Use a separate tray and clean tools between plants.
- Compare the plant’s condition during repeated inspections.
- Investigate warning signs before choosing a treatment.
- Follow product-label instructions if pest control is required.
- Continue observation until the evidence supports introducing the plant.
- Monitor the plant after it joins the collection.
Quarantining new houseplants is a practical precaution that helps protect the collection you have already built. By inspecting carefully on arrival, maintaining suitable separation, recording changes, and responding thoughtfully to warning signs, you can make better decisions about when a new plant is ready to share space with the rest of your indoor garden.